
Make your own flowerpot ollas
Ollas are old-tech made new. They are a GREAT tool for watering your garden during drought-stricken summers.
And you can make your own — quickly and easily, for very little money — with parts from any home supply store.
A traditional olla is an unglazed pot with no hole in the bottom. You bury it in your garden at planting time, fill it with water, and it slowly “sweats” water, keeping your garden soil moist. Your plants and your soil critters will love it!
The traditional olla has a curvy pear shape. Once installed, only the neck is visible. Traditional ollas can be hard-to-find, and pricey once you find them. I’ve also heard they are easily breakable. I don’t own a traditional one, but I have made my own unconventional ones, and mine work great!

What you need:
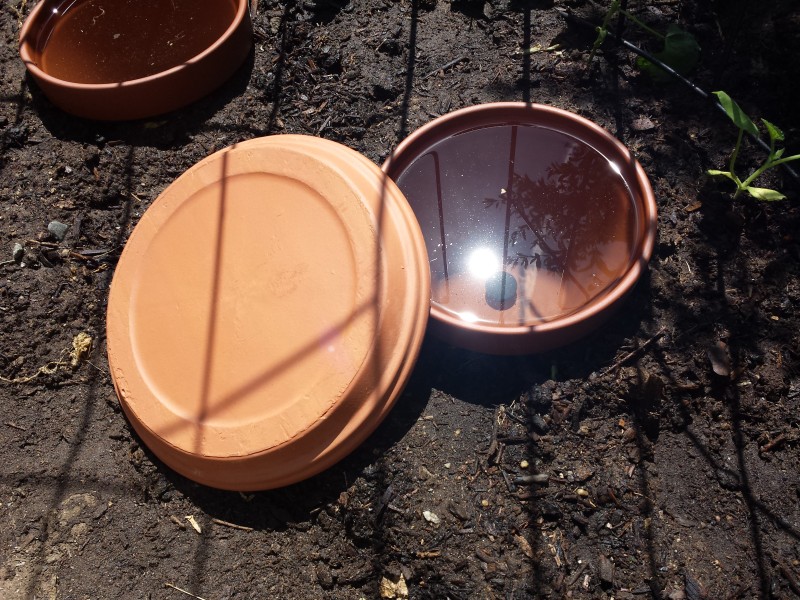
- 1 unglazed clay flowerpot, I use 10″
- 1 flowerpot saucer, to fit the TOP of your flowerpot, I use 12″
- 1 rubber stopper from the plumbing department, sized to fit the flowerpot hole. I use 1″x1.25″, which works out to #6 stoppers through online scientific supply stores.
- a small level can be helpful.
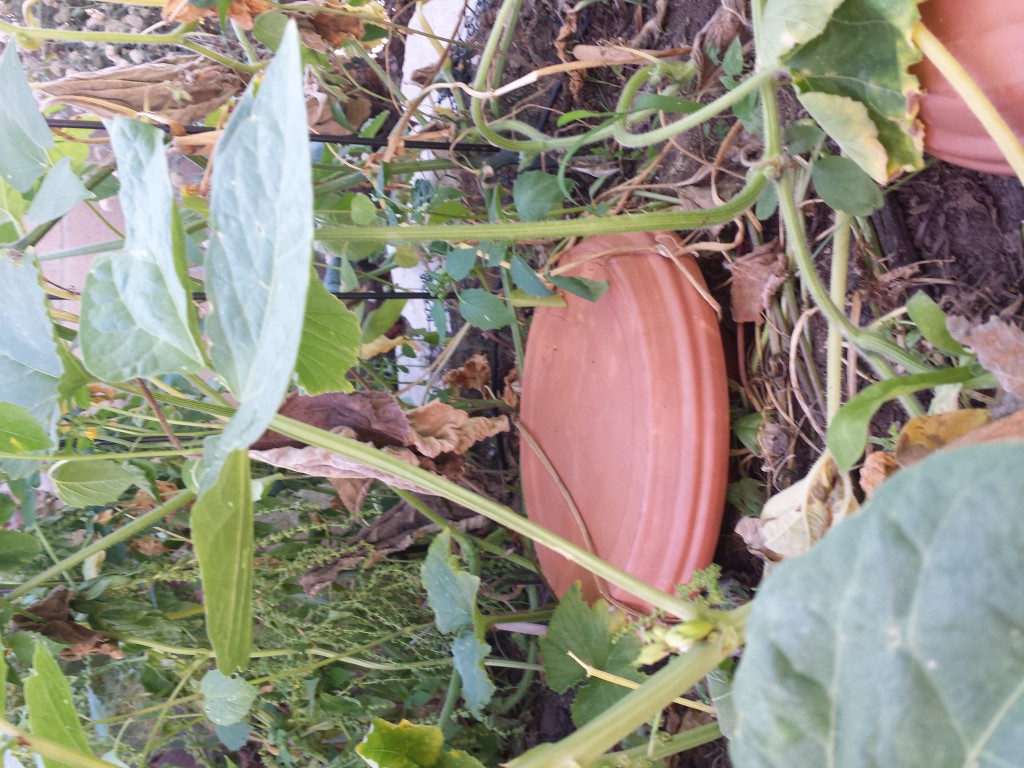
Dig a hole in the center of your garden. Put the flowerpot in the hole, buried up to the ridge around its neck, and assure that it is relatively level.
Plant your garden in a circular arrangement around the pot. Try not to get dirt inside the flowerpot.
- note that squashes LOVE to be planted in the soil directly around an olla! it’s a great way to water thirsty squashes without getting those fuzzy leaves wet (wet leaves worsen mildew issues).
Push the rubber stopper into the flowerpot’s hole. I tend to do this from the inside of the flowerpot, so that the wider portion of the stopper is pointed skyward. Make sure rubber stopper is seated quite firmly.
Water your garden normally, plus fill the flowerpot with water. Invert the saucer over top of the flowerpot to keep out debris, mosquitos, and critters. Then mulch your garden to cover the soil surface — using straw, dry leaves, grass clippings, whatever you have around.
My flowerpot ollas will seep water for about 2.5 days. I have heard that traditionall ollas remain filled about the same amount of time. My plants are responding great to the olla treatment!
Here’s another type of homemade olla using flowerpots and gorilla glue. And an article that includes plant spacing for ollas and water spread for ollas.
Related: How to build a garden sink , Raised beds vs sunken beds , Water wisdom for high-yield gardens
